How building a design system empowers your team to focus on people — not pixels.
This post is the first in a series about HubSpot Canvas, our new Design Language. There’s an old comedy skit about a mailman who decides he’s no ...
Consistency and quality are central to a good user experience. But despite your — or your product team’s — best intentions, inconsistencies and unintended consequences will inevitably crop up. And if you're not careful, you'll end up with a poor user experience and a lot of design debt. We all know it takes a lot longer to dig yourself out of debt than it does to avoid it in the first place, so we try to avoid design debt from the start by explicitly including design review and design QA in our process.
Design Debt affects the integrity of the user experience. This is what happens when a bunch of incremental changes collect over time and yield a disjointed, inconsistent, and patched-together experience.
— Austin Knight, Design Debt
By incorporating design review and QA into our process, we’re able to check and recheck that we’re staying on track and delivering on the original intent of the experience.
But what do we mean by those different terms?
Design review is what we do at regular intervals during the design process.
Design QA is the final, more rigorous check.
 We approach the whole process as a team sport. Everyone’s role — research, design, content, engineering — affects the customer experience. So we run design review and QA on individual issues on GitHub, so everyone can participate in the conversation in a centralized place. This is also a great practice for distributed teams, since the conversation can be asynchronous, and anyone can join in, get caught up, and explore the full context on their own time.
The process that leads up to the final design QA step is as important as the last stage itself. Because if you’re collaborative and communicative throughout the whole process, the final QA piece can be a relative breeze.
Here are the guidelines we try to follow throughout the whole design and development process.
Good design is a conversation, not a series of episodes of individual work. Just as it's best for designers to show their ideas to engineers early in review meetings, it's better for engineers to show designers their work early, too. We encourage engineers to share their work with their designer in GitHub long before it’s ready to ship.
If there are inconsistencies between design and what has been coded , the designer can easily chat with the engineer to explore how to address it.
Each development process involves several touchpoints during which a design can be evaluated for adherence to intent and consistency with Canvas, the HubSpot Design System. Each of these touchpoints offers a chance for the engineer and designer to check in with each other and make sure everything’s going according to plan.
So before anything gets passed into the next stage of the process — whether it’s just a review or into production — a designer gets called in to take a look at what’s there. This responsibility goes both ways, of course. Engineers are asked to take that moment to get a designer to review something, so designers need to make themselves available when called. Nobody’s expected to drop everything, of course. But a response within a reasonable amount of time is necessary to keep things moving, and to maintain a tightly knit collaboration on a small, fast-moving team.
Usually a team will define their quality acceptance criteria together, before anything gets built. Then, when specifications for the design are provided to the engineer, everyone has the same expectations for how precisely it will translate into reality.
It is the whole team’s responsibility to ensure that the software is rendered as the designer intended, which is why ongoing communication and collaboration are so important.
So what happens at those various touch points along the way when a team gets together for a review? Basically, it’s a short presentation and feedback session of potential design issues at various levels of fidelity. And the meeting should be with a diverse group of role representatives, so that different priorities have their own voice in the room.
User desirability ‐ Usually represented by a designer
Business viability ‐ Usually represented by a product manager
Technical feasibility ‐ Usually represented by a tech lead or senior engineer
The review session is where all those important but sometimes conflicting needs are aligned and any potential tradeoffs are discussed.
The objective is to ensure that everybody comes to a high level of agreement that the design solution meets the business requirements, is technically feasible, and accurately reflects the needs of the user.
A design review isn’t a backlog or catch-up meeting. Not everyone on the team should attend. But it is important to make sure the three viewpoints above are all in the same room.
A lot has been written over the years about how to run a good design review. We don’t set out to reinvent the design review wheel, but we’ve found that adhering to the following guidelines help us make sure our design reviews are conducted, attended, and effective.
While it may be challenging to address 100% of inconsistencies all of the time, doing Design QA is a big step towards combating design debt.
— Jess Eddy
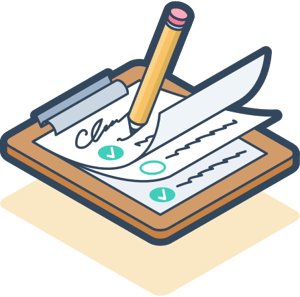 Here’s a sample checklist of what we’ll look for whenever we need to review a design:
Once the conversation of the design process has taken its course, and the team agrees that it’s time to see if a thing is ready to ship, it’s time for the final Design QA piece. Your process may vary depending on the tools that you use. The important thing is to establish a clear, step-by-step process that you follow each time.
By following a shared process of regular review and QA, we’re able to make sure that our designs are delivering on our original intent. Not only does this allow us to deliver a great result to our users, it keeps our teams working happily and healthily together, and helps keep us from digging ourselves into a hole of design debt.